In this part of the series, we're going to really dig into what state actually is. We'll use analogies from real life, and then look at how we might model real-life state using Python data structures.
But first, we'll discuss a common problem that all budding electronics engineers have to deal with at some point: "noisy" buttons and how to make them "un-noisy", commonly referred to as "debouncing".
We'll talk about fixing the problem in the worst, but maybe easiest way: by blocking. We'll also talk about why it's bad.
A Use Case For State: Debouncing Buttons
Most electronics projects will have to deal with "bouncy" inputs, buttons in particular.
"Bounce", in this sense, is essentially a noisy signal. Logically, you would think that if a button was pressed, that it would be a simple boolean value - it's either "on" or "off". It's "HIGH" or "LOW", True or False.
In reality, these values refer to a voltage, or the lack of a voltage. For our M0/M4 boards, that voltage is 3.3 volts. When the voltage is at 3.3 volts (plus/minus some wiggle room), the pin will read True or "HIGH". The voltage is "on".
When there's no voltage (plus or minus some wiggle room), the pin will read False or "LOW". The voltage is "off".
Note
I'm putting terms like "HIGH", "LOW", "on", and "off" in quotes, and the python booleans, False and True in monotype for a reason: these terms are all mere representations of what a pin is doing. There's an abstraction at work behind the scenes. I want to use terms that you will see in tutorials and documentation, but you shouldn't take them for granted. What they really are, under the covers, will vary depending on the context. These terms are really just convenient ways for human beings to reason about what the microprocessor is doing.
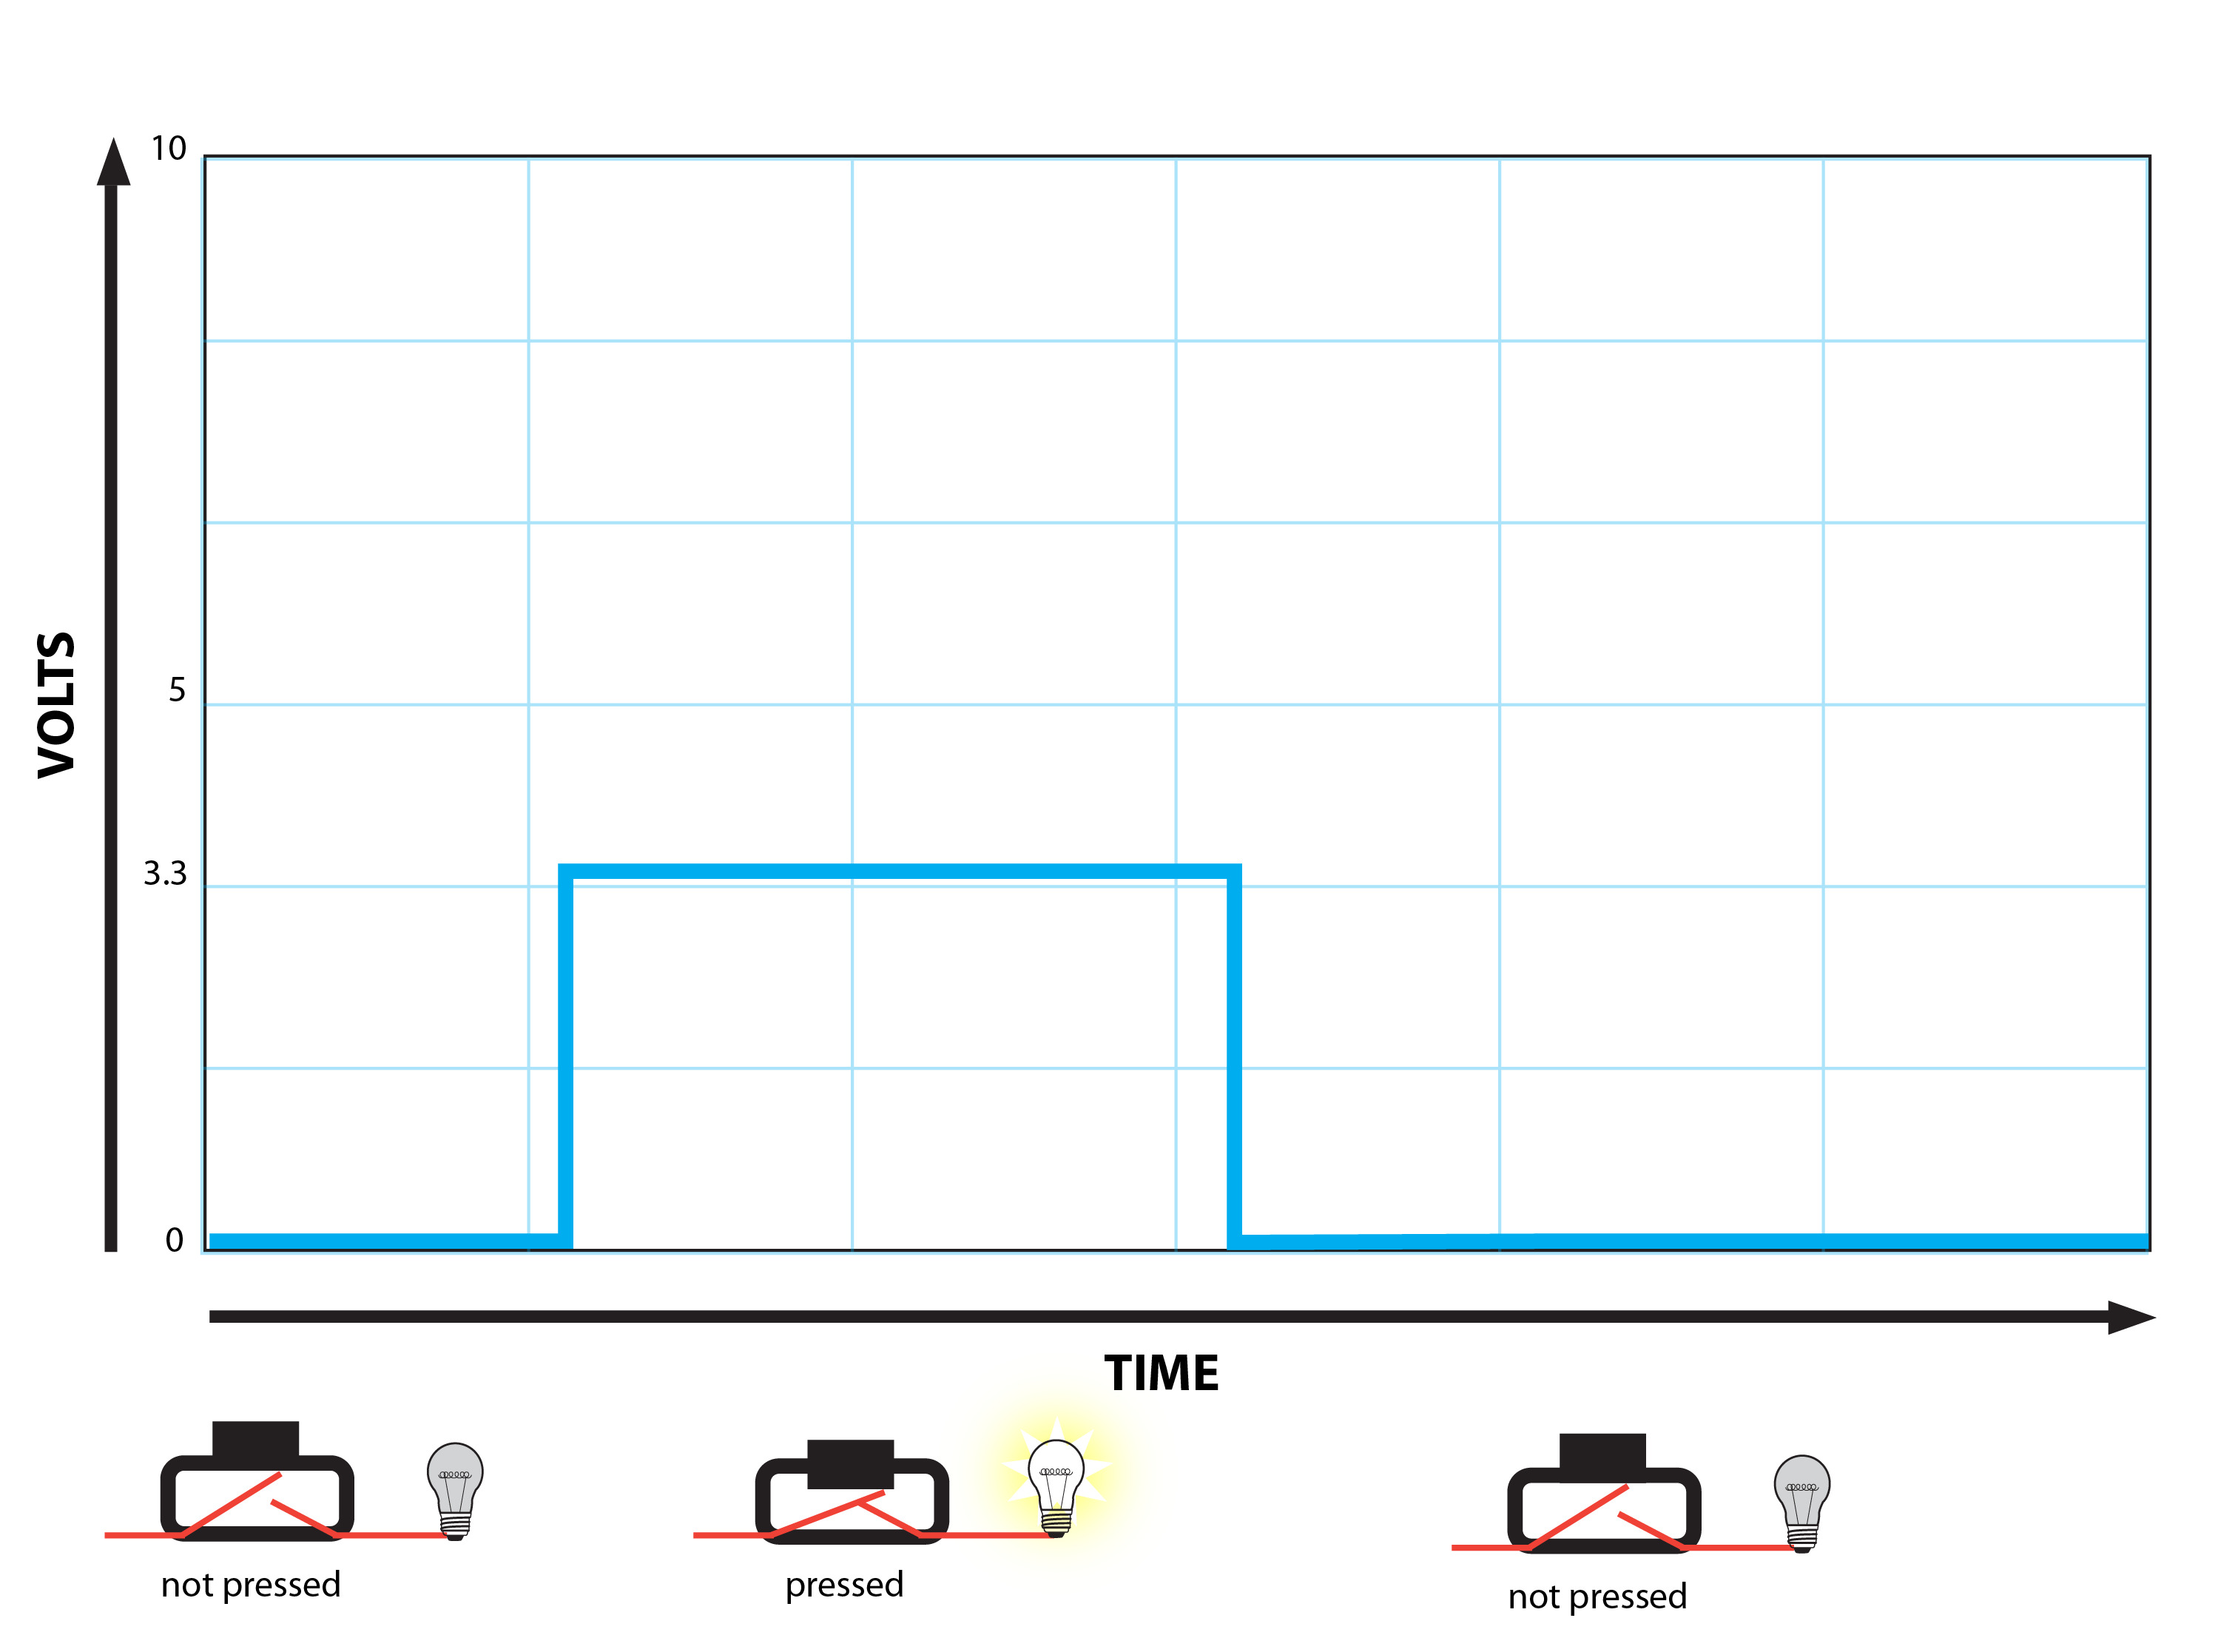
An ideal button being pressed and released might look something like this, if we graphed the voltage over time:
The problem is that you will rarely ever get such straightforward readings. You'll instead get what looks like many pressings in quick succession:
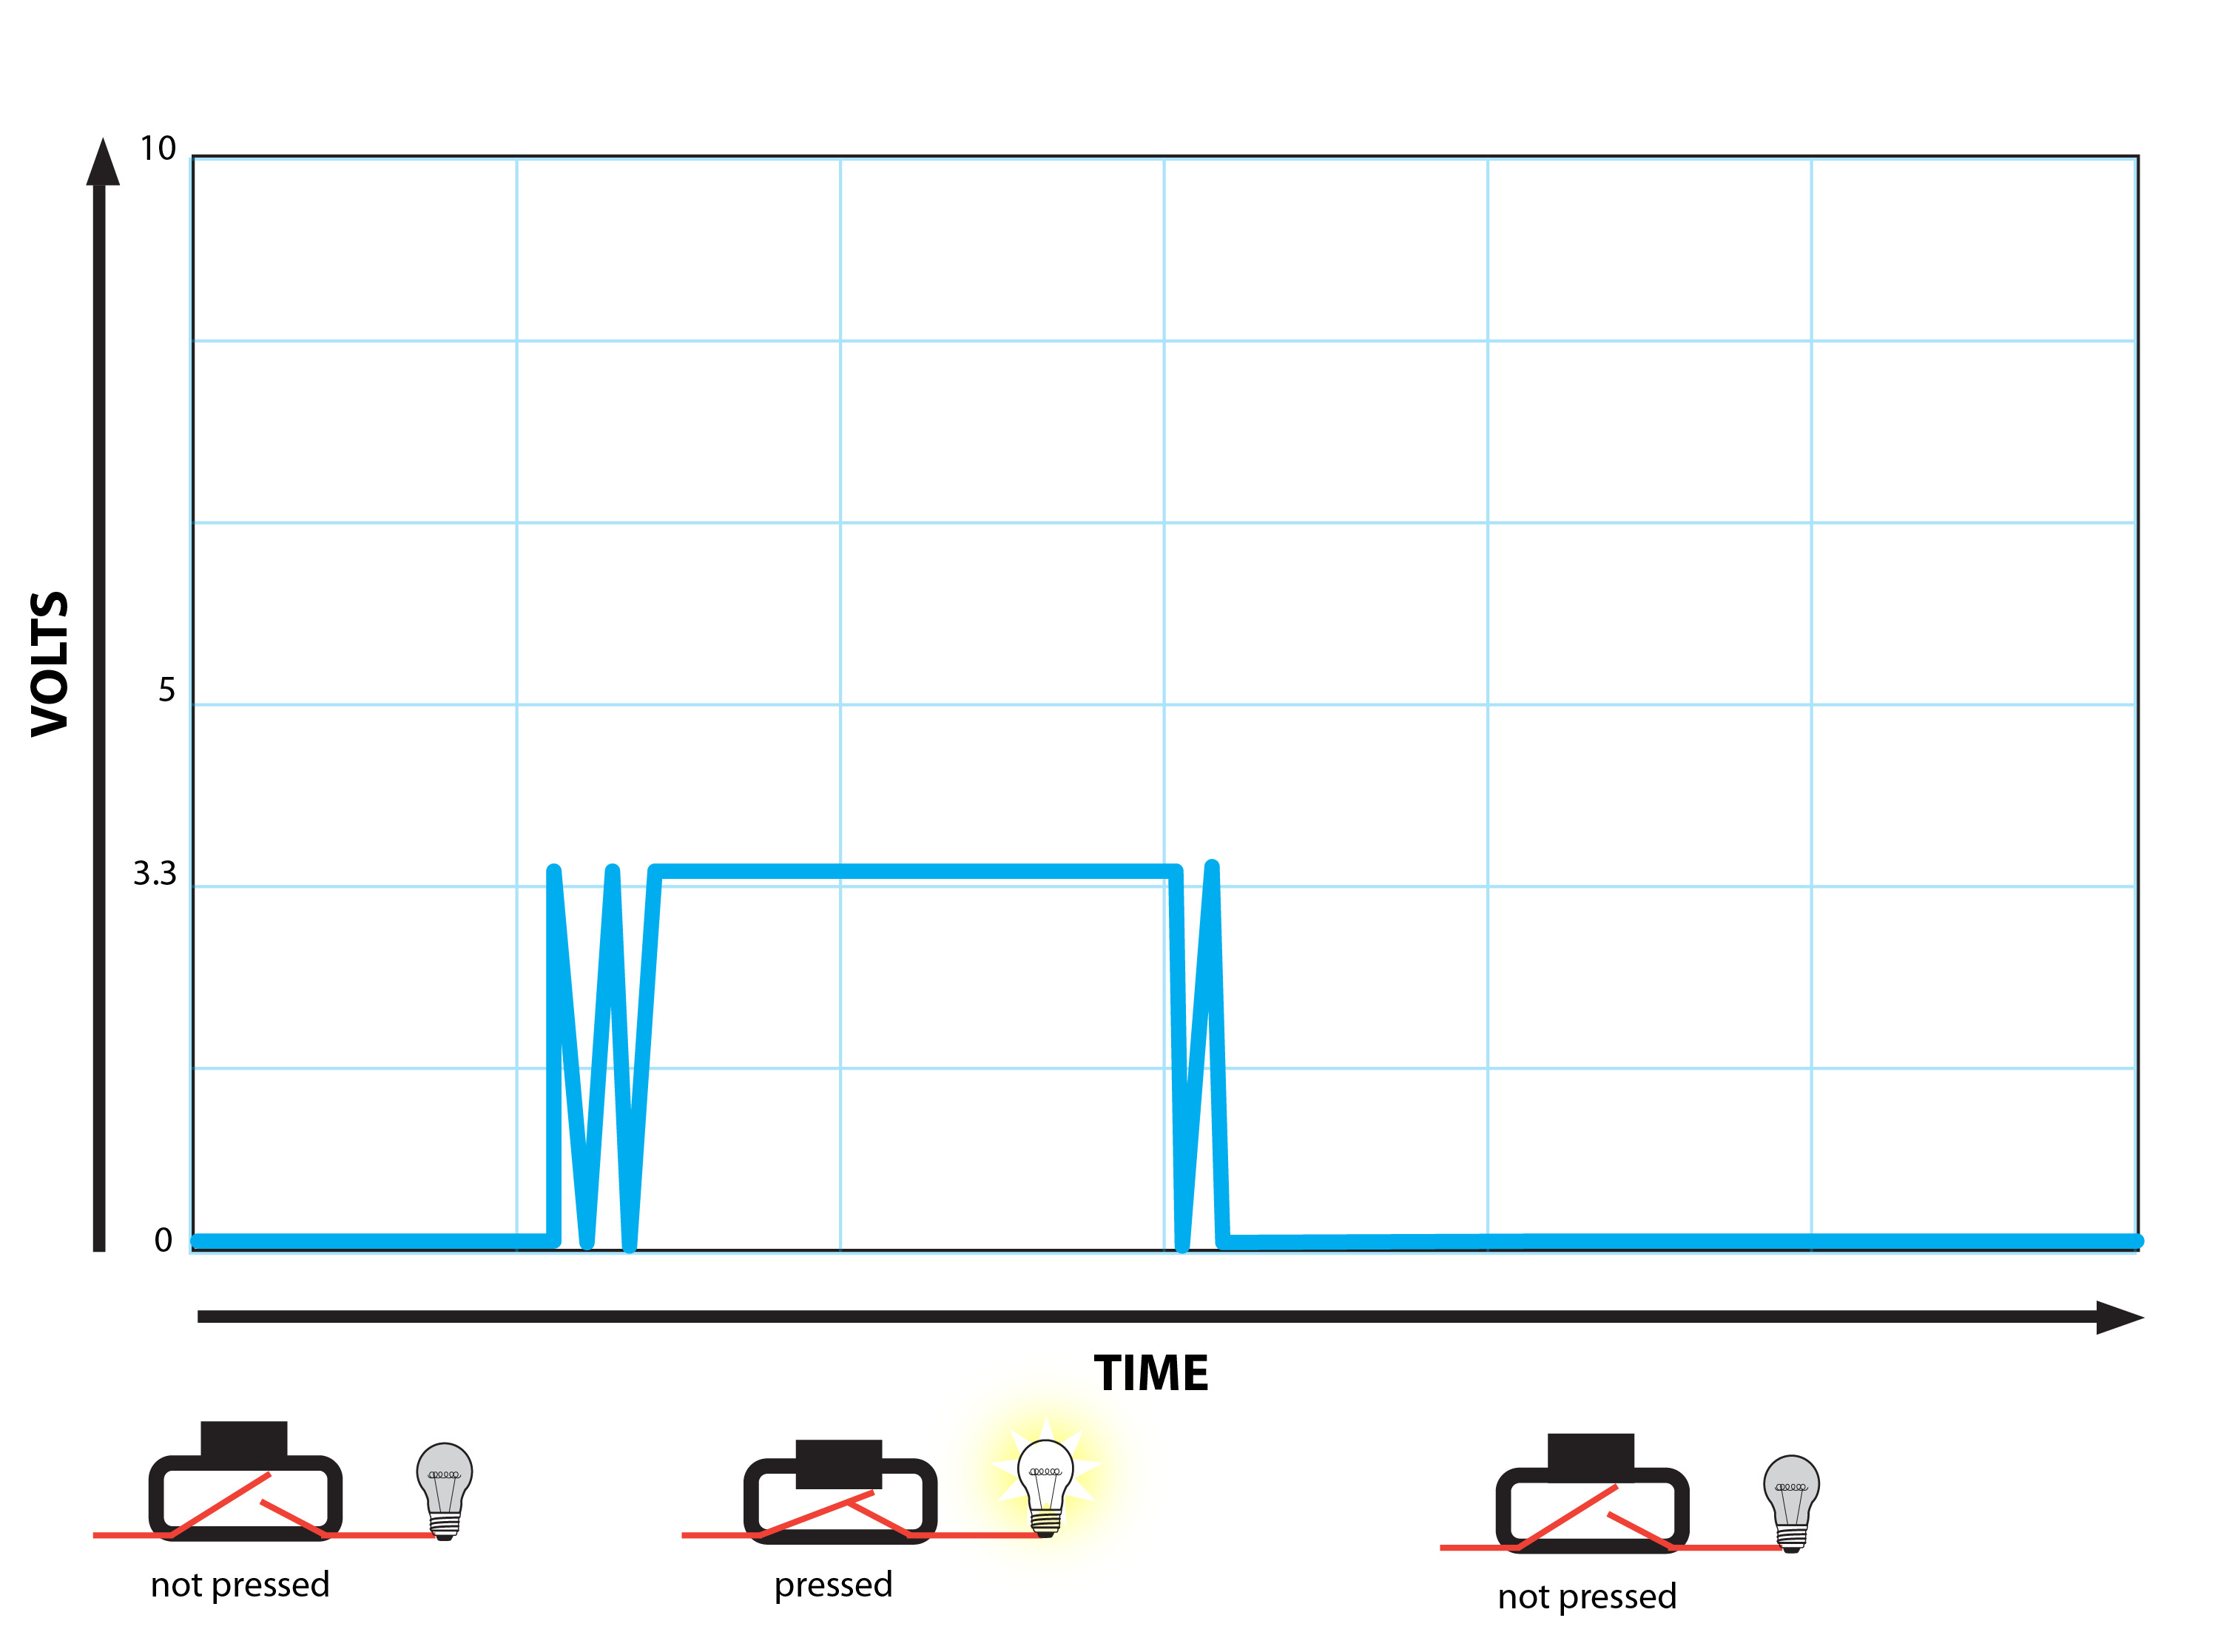
What causes this? It's due to the realities of turning physical interactions into digital signals: when a button is pressed, a piece of metal crosses two contacts, completing a circuit. The microcontroller has an internal threshold that decides how much current constitutes "on" (or "HIGH"), and how much constitutes "off" (or "LOW") - the aforementioned "wiggle room". That threshold can be shockingly large - sometimes what you would think is a "weak" signal, the microcontroller interprets as "HIGH".
Then there's the buttons themselves. Most buttons are composed of two pieces of metal that are separated by a physical gap (represented by the red lines in the charts above). When you press the button, the metal pieces are brought into physical contact, causing current to flow through them as if they were a solid conductive element (like a continuous piece of wire or a copper trace on a PCB).
Since electricity really wants to flow, if given sufficient current and a short enough distance, it will jump through the air. When this happens inside of a button, it causes current to flow momentarily before the contacts are fully in contact, which can cause a spike in the current being read from the microcontroller pin.
Further, inconsistencies in the metal due to manufacturing or wear can cause multiple subsequent spikes to be sent to the microcontroller prior to the most "solid" one. Even when continually holding down a button, the strength of the signal can vary quite a bit over time. Sometimes it varies enough to be noticed by the microprocessor.
As the button is released, the same issues happen again.
In the case of a capacitive input, the capacitance that is increased by the user interacting with it is detectable long before the user has contacted the pad. It's not always possible to determine precisely when someone has contacted the pad, or we're just detecting a change in capacitance because someone is simply near it (we can use this to our advantage in some applications). There's also potential issues with interference that can make the signal more noisy than it should be.
The two types of inputs are noisy for different reasons, but the problem is the same.
Note
This all a bit oversimplified. There's a lot more going on when it comes to a digital pin being read, or a capacitive sensor being interacted with. We will get into the (again, overly simplified) concept of "clocking" in the next installment - the physical stuff we're discussing here is also affected by the timing of processor cycles.
The two overly-simplified subjects are very complexly related 😀.
A good (but a bit of a feet-first dive) discussion of how the "clock" works is covered in an article by sparkfun. It's by no means a complete discussion of what's going on when we read a digital pin. But I figure that if it's a bit hard to wrap your head around as a whole, the Sparkfun article should give you enough keywords to dig further (the other parts of that series are good too).
I also recommend a book like Code: The Hidden Language of Computer Hardware and Software by Charles Petzold to give a very gentle (but pretty thorough) introduction to how computers (like the processor in our M0/M4 dev boards) work on a fundamental level.
This is stuff that is important to understand, but you don't need any depth of knowledge of it to accomplish what we set out to do in this series.
Where you think you can use a logical check of a pin's status (if pin.value) in your code to determine if the button is pressed, and do something, it's not that simple. Without smoothing out the signal from the pin, your code will end up executing many times before the button is even fully pressed down. The number of times will vary from button to button, and can even vary from day to day.
Note
For an in-depth analysis of button bounce and possible solutions, check out A Guide To Debouncing from the Ganssle Group. It's the best discussion I've found in my research, and often cited by other tutorials that you run into on the subject.
Maybe for some applications, like turning on an LED only while a button is pressed, it's not really a problem. But if pressing that button has side effects it can be really, really bad.
What are side effects? These are changes that occur outside of the code that is executing, because of the code. Typically, this means we're altering data outside of our scope (function, method, module, instance, etc), but it can also mean that we're doing something in the "real world", outside of the computer. Altering a global variable would be a side effect, as would turning on an LED. These side effects are pretty innocuous, but imagine the side effect is something like writing data to a file. If things aren't kosher, we might write bad data or corrupt something. What about triggering a relay to turn on or off a piece of dangerous machinery, or sensitive equipment? That could cause physical damage to the equipment, or even hurt someone.
So it's not just about having clean code that's less bug-prone (the main concern for most programs). Since we're programming an electronic device that interacts with the real world, we have to be especially conscious about side effects, since they could have real-world consequences.
Tip
Wikipedia has a pretty good article about side effects if you want to read more.
There's more to it than just noisy buttons, though. There are other "bouncy" signals that aren't quite as chaotic as button bounce, but need to be dealt with in the same way. This could be digital temperature readings from a thermocouple module (like this one), or an analog signal derived from the changing resistance of a photoresistor. Button bounce is the most common kind of "noise" you may have to deal with, but it's definitely not the only kind you'll run into in your projects.
But there's something else to consider: our goal is, ultimately, to have meaningful signals. We want to only trigger side effects when necessary. You press the button, the LED turns on. Once we account for the noise, we're really close to that goal. However, there's one more obstacle in our way: the manner in which our code is being run by our development board.
Our microcontroller code runs in a "main loop". In CircuitPython, that's usually a while True: block. Inside of that block, we process inputs, do side effects, etc.
CircuitPython runs that loop as fast as it possibly can.
This means that your main loop is executing many thousands of times per second. If you check a pin or sensors status every loop, even if the button or sensor is fully "debounced", your code will still get called many, many times. A perfectly clean signal will still trigger your code to run over and over and over. If there are side effects, they will be run over and over and over as well.
Blocking: One (not great) Solution
The easiest way to deal with all of these issues, and the most common seen in "getting started" tutorials, is to "sleep" the processor for a few fractions of a second before checking an input's value. In programming, we use the term block to describe this sort of behavior.
"Blocking" is any action when you tie up the processor. When code is blocking, little, if anything else can happen until the blocking code finishes. We can't read sensors, we can't turn LEDs on or off, we can't even change variables in memory. Everything is on hold, while we wait for that blocking code to do its thing.
Note
Code can block for lots of reasons. Input and output (aka IO or I/O) are the main sources of blocking code - CircuitPython is really efficient in how it reads from or writes to digital pins (inputs or outputs to digital pins), but there's still the possibility of blocking when we do. It's just normally so quick that you don't notice it.
In your own code, it's usually easy to see where you might be blocking, but there can be blocking code lurking in the libraries that you use. Sometimes it's necessary due to the hardware or some protocols that are in use, but sometimes it's possible to accomplish the same functionality without blocking.
This is one of many reasons it's a good idea to comfortable reading Python (and C/C++, if you can) so you can dig into the source code for libraries.
This way you can see any potential problems before your project is too far along, and refactor things (your code or the library) if the blocking is going to cause you grief.
You will also learn a lot, the people who work on CircuitPython and contribute libraries are seriously smart and do some great work 💖.
And maybe you'll find a better way to do something and contribute it back to the community! 🦄
We've already seen some code that blocks in the testing section of the first article in this series. We're using a Python function called time.sleep(). All that function does is tie up the processor for the given number of seconds. It's purpose is to intentionally block the code that's executing.
In the testing code, we block for 0.2 seconds. This amount is considered "standard" for button debouncing. It's an arbitrary amount, suggested by a lot of articles and papers that tackle the problem. It was derived by experimenting with many buttons, actually tracking their voltage as a waveform on an oscilloscope - the output on the scope in these experiments looks a lot like the contrived example we saw above.
The amount of time it takes for the signal, generated by most buttons, to look more like the ideal square wave in the first chart is around 0.2 seconds.
There's also a psychological aspect to it. 0.2 seconds has a good "feel" to it - when you press a button, 0.2 seconds is about how long it takes you to feel confident that you've successfully pressed the button.
Tip
Look at this number as a starting point when debouncing buttons. You should feel free to experiment with other values in your projects - do what feels right for you and works best for your requirements! There are times when a more sensitive button is more appropriate (like in a video game), and times when a less sensitive button is required (like when your users are kids or people with limited mobility).
The buttons you use will impact this interval as well. More "quality" buttons will be less noisy, and can handle a shorter interval.
In any case, be creative, and experiment to find the right values for your use cases. It also doesn't hurt to recruit some friends or family to test your project for you.
So by blocking, we are only checking the status of the button 5 times every second, instead of 48 million times every second. 🤔
This effectively smoothes out the signal from our input pins, by reducing the number of times per second that we check the status of the button. Another way to state this is we've reduced the sample frequency of our input. The noisy parts of a button's press and release cycle happen in very, very short bursts, so by reducing the sample frequency, we clean the signal of that noise.
This works for other inputs too - if we have a really sensitive sensor that is constantly "wiggling" its reading up and down, sampling its value less frequently will give us more stable data to work with.
Now that blocking code is in place, we can consider the button fully "debounced".
Note
The actual number of times your code runs is limited by many things, and even in an ideal situation, it will likely never actually run 48 million times per second. It might get close, 30 million, 10 million... It's still a lot.
The problem, as you will recall, is that while code is blocking, nothing else is happening.
This can severely hamper our projects, especially as we graduate from simple "blinky" first steps and get into more complex applications. As we add more buttons, and additional types of sensors, we can't react to user input or changes in sensor reading while we're waiting for a button to stop bouncing. We can't update our outputs either. We can't refresh an LCD display, play a sound, toggle an LED -- nothing.
We have to do everything every 0.2 seconds when we block like this. Again, for something simple like our testing code, this is not a big deal. But imagine you are building a video game console, like the Arduboy. 0.2 seconds is an eternity when playing a video game. Your user will get frustrated really quickly - or be able to hit every enemy because they're essentially moving in slow-motion. Every frame has to be drawn, every input has to be read, every sprite has to be updated only when the code stops blocking, every 0.2 seconds.
There's another tragic aspect to this: those 48 million cycles we have at our disposal are being completely wasted while we block. We are throwing away processor cycles we could be using to do work. 💔
Ok, so by now you're thoroughly convinced blocking is bad news. So what can we do instead to debounce our inputs?
Debouncing Options
We have a few viable options:
- For buttons, we can use an R/C filter circuit to clean the input (a.k.a. hardware debouncing).
- We can use an integrated circuit, or IC that does debouncing, or input filtering for us.
- We can use interrupts.
- We can create a data structure that tracks the status over time (or state), of our inputs.
Hardware debouncing is only really useful in situations where the debouncing needs to be rock solid. It requires more components, which increases the cost (more of an issue in industry) and introduces more complexity (more of an issue for us as hobbyists). But even with really solid hardware debouncing, we still need to be concerned with the realities of reading a digital input. Remember, what feels like a momentary press for a human being is an event that lasts many many processor cycles - the signal may be "clean", but we still have to be careful not to take action every single time we notice that clean signal reads "HIGH".
Tip
R/C ciruits might be overkill for button debouncing, but they are fundamental building blocks of electronics. You should spend some time reading about them and building some, you won't regret it.
Specialized button debouncing ICs are rare and tend to be expensive (the expensive part is again more a problem for industry, but the rare part is a big deal for us as hobbyists). For analog sensors, an IC like an analog-to-digital converter could theoretically be used to reduce the sample frequency of a noisy input. We could even program another microcontroller to do debouncing for us.
Again, these solutions are more expensive and add complexity. And yet again we still have to be conscious of the fact that even a "clean" signal will be read many, many times per second by our main loop.
Interrupts are extremely cool - you can configure the processor such that when a pin reads "HIGH", it triggers the execution of a predetermined chunk of code. The ATSAMD21 processor in our M0 boards allow for interrupts on nearly every pin. However, interrupt functionality is not currently exposed in CircuitPython 💔, so it's a non-starter for us.
Tip
If you are interested, Adafruit has a nice guide to interrupts on the Arduino platform available.
Part 1 of the guide covers an alternative approach that is very similar to what we'll be using in this series.
Ultimately, tracking this so-called state is really the best option most of the time - and as we've seen, even with other debouncing methods, we will still need to deal with it (we just didn't call it state above 😉).
In the next section, we'll start from the ground up and really dig into what state is all about. We'll see how it's ideal for cleaning inputs, and also how it opens up some really useful pattens for making our code cleaner and more reliable.
Basics Of State
Let's start with basic definitions. State is simply the status or phase of something at a given time. It's how you would describe something that can transition, over time, from one state to another.
For example, water has three common states (referred to as phases): gas (steam), solid (ice), liquid (usually just called water).

State is a kind of abstraction that refers to bundles of properties (or attributes) of something at a given time. Various factors can cause those attributes to change. When that happens the state transitions from one state to another.
For example, when water is brought to its boiling point of 100° C (212° F), it transitions into a gas. It becomes less dense, and given the opportunity, it will disperse throughout a space.
Another way to say this is that water's temperature attribute has changed to a value above 100°, and so the state has transitioned to "steam". Now that it's in the "steam" state, there are other attributes that have changed besides the temperature (its density, for one), and it has new attributes - it can do new things, like fill a space.
The same is true for water condensing, melting, or freezing - the state changes as water's attributes change, and new attributes emerge.
Tip
In programming, "properties" and "attributes" are often used interchangeably. We're settling on the term "attributes", since that's the term most commonly used in Python when talking about classes (which we'll get to later).
Water has multiple attributes in each state. We could record each of those attributes numerically - the temperature, the volume, the density - even attributes that are more binary (true/false) like "solid" and "liquid". Keep this in the back of your mind for now.
Lets look at another example, this time from a area of life that lives and breathes metrics: sports.
Score Keeping Is Tracking State
Keeping score during a sporting event is a way of tracking state. A performance happens, a ball is hit, a race ends, and the score is recorded.
Here's a common type of simple scoreboard for sports like gymnastics:
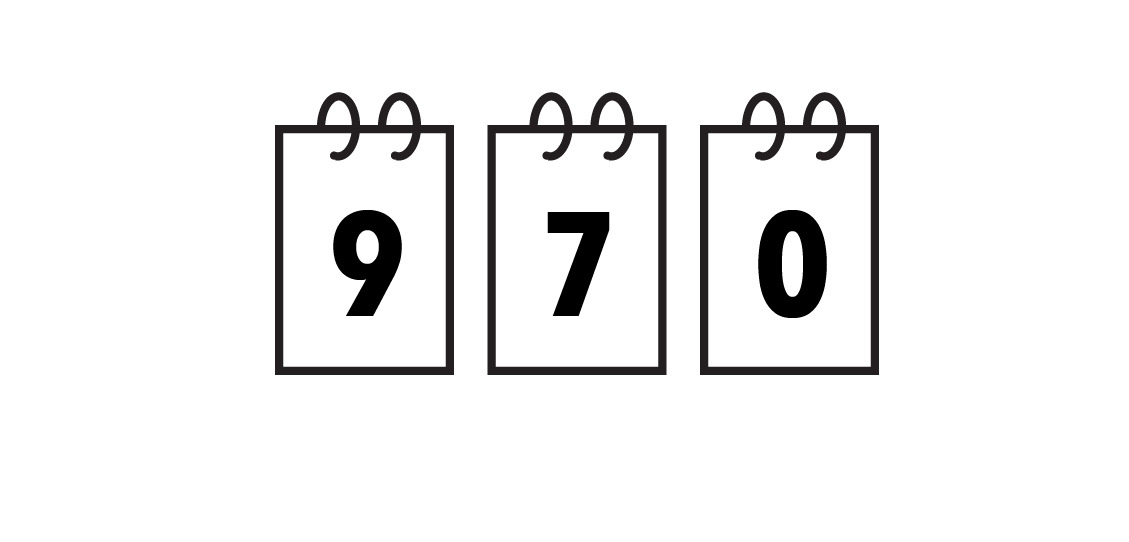
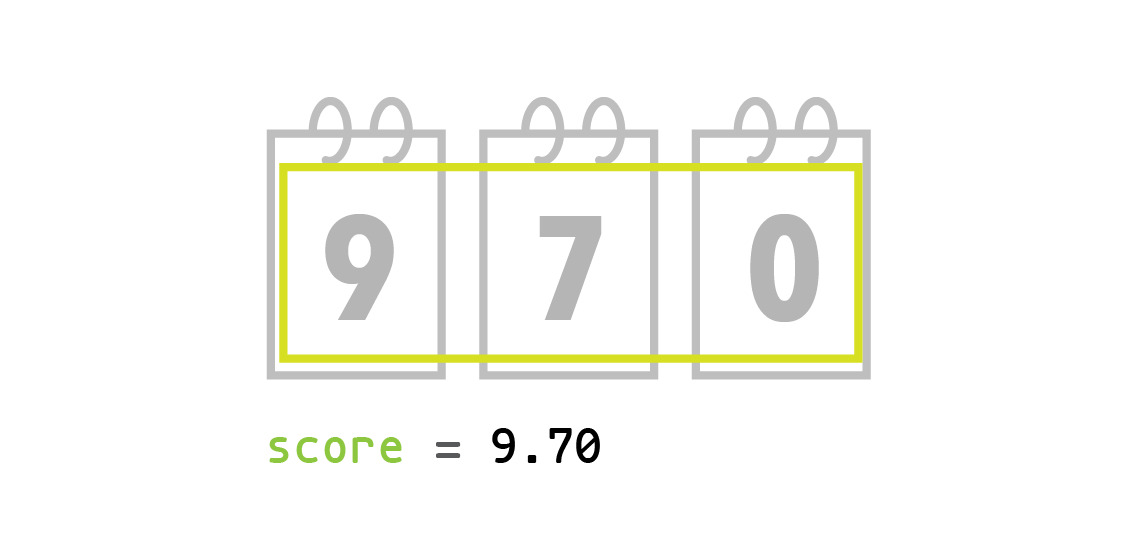
It's a single score, from a single judge. This scoreboard scores from 1-10, with fractional values down to hundredths of a point. This score is 9.70.
If we modeled the scoreboard in Python, we could use a single variable to store the score:
Here, we simply name the variable score. If we were modeling a real gymnastics match, we might want to differentiate between different scores, since there will be one for each judge, and each participant:
1 2 3 4 5 6 7 8 9 10 11 | entrant1_judge1 = 9.70
entrant1_judge2 = 9.45
entrant1_judge3 = 10.0
entrant2_judge1 = 8.75
entrant2_judge2 = 9.00
entrant2_judge3 = 8.80
entrant3_judge1 = 10.0
entrant3_judge2 = 9.99
entrant3_judge3 = 9.98
|
This straight-forward, but a bit unwieldy. We're only set up for three judges, and three entrants, and a single match. In a tournament there may be 10 matches, and there could be dozens of entrants. That's a lot of variables to track, and all we're tracking is the scores. Imagine if we also wanted to give the entrants a name or id number, or track their vital statistics! What if we wanted to track how these values change over time?
We can simplify and generalize things a bit by using Python's built-in data structures.
Tip
If you aren't familiar with Python's built-in data structures, Adafruit has put together a simple guide.
There are many, many ways to model a match like this, here's just one using lists and dictionaries:
1 2 3 4 5 6 7 8 9 10 11 12 13 14 15 16 17 18 19 | matches = [
[
{
"judge1": 9.70,
"judge2": 9.45,
"judge3": 10.0
},
{
"judge1": 8.75,
"judge2": 9.00,
"judge3": 8.80
},
{
"judge1": 10.0,
"judge2": 9.99,
"judge3": 9.98
}
]
]
|
To access the second judge's score for the third entrant in the first match (remember list indexes start with 0):
matches[0][2]["judge2"]
So that works for modeling something like a gymnastics match, where you have somewhat similar data, but it is recorded multiple times.
A class might be better, since we can model what a "match" or an "entrant" looks like once, and then make new instances as our tournament progresses (we'll talk about classes in depth shortly).
Global State And A Better Analogy
In a microcontroller project, we're dealing more with what might be called global state - a single group of attributes that are used by the whole project. We need to track our buttons, digital pins and sensors in one place, and use the values throughout our project. It would be best to have a single source of truth, or one place to look for information about what state our project is in.
With the gymnastics example, we've covered capturing multiple states, and we've stored them in multiple places (either individual variables or a more complex structure, but each score is separate).
In a microcontroller project, our state is a bit different. Since we have a fixed number of buttons, we just need to know if they are pressed or not. Our gymnastics example was more like a ledger, and we need something different.
A better analogy that more closely models our requirements is the scoreboard from a team-based sport. A sports arena/field will typically have one giant board that tracks the state of the entire game - all relevant information you need to understand the progress of the game is available in one place. It's globally accessible, you can see it from any seat - you just need to look at it.
Here's a contrived example of a typical scoreboard from an American baseball stadium:

It has various regions with indicators, usually lights, and numbers representing the state of the game. Each one represents an independent piece of important information. That information changes as the game progresses. Outs are made, points (runs) are scored by each team, innings go by (there are 9 in a typical baseball game). Other bits of data are recorded too - balls, strikes, outs. These are used to move the game along in various ways.
Tip
The nuances and rules for American baseball are not relevant to our discussion. However, if you aren't familiar with the game, and want to dig in, the wikipedia article is the place to start.
We can model a scoreboard as a series of individual variables, like we did initially for the gymnastics match:

This is totally viable, and cleaner than doing the same thing for a gymnastics tournament. Since a baseball game changes state over time instead of accumulating multiple scores, having simple global variables for each state attribute we care about makes sense.
There are alternative ways of modeling global state like this, however. The two primary ones are: using a dictionary and using a class.
A dictionary in Python is a key-value mapping, also known as an associative array, hash, or hashmap. We worked with these earlier in the gymnastics example.
Data is stored by name in a simple table. Here's what our scoreboard looks like as a dictionary:
1 2 3 4 5 6 7 8 | scoreboard = {
"ball": 1,
"out": 1,
"strike": 2,
"guest_score": 5,
"inning": 2,
"home_score": 10
}
|
We access the various values like this:
1 2 3 | outs = scoreboard["out"]
scoreboard["inning"] += 1
scoreboard["guest_score"] = 6
|
So we have a single, global state variable, scoreboard, that contains all of the information about the game. As the game progresses, scoreboard's members are updated.
This has the advantage over using a series of variables in that it is more compact, but flexible - we're only using up one variable name, and the names of our state attributes can be almost anything - words with spaces, dashes, even other objects.
Note
For an object to be used as a dictionary key, it must be hashable.
Another advantage is that we don't have to worry about collisions with other variable names - say we're recording the number of balls scored in a variable called balls instead of ball, and we're also tracking the number of baseballs that have been used in the game. If we called that variable balls as well, it would conflict with the special state variable that has a totally different meaning.
Since the dictionary is self-contained, we only have to worry about conflicts between key names within it - we don't have to be concerned with what's going on in the rest of the code.
Note
I admit this example is a bit contrived. You may be thinking "well, why can't we just name it baseballs or balls_used and call it a day?"
This is true, and would be a totally acceptable solution. But keeping all of your variables separate in the same scope can get really messy over time.
As the project progresses, say you also need to track baseballs lost, and baseballs that were caught by fans. Again, you could add more global variables with names like balls_caught, and balls_lost. But now we have 4 variables. Some are related (referring to actual baseballs) and one is completely different (balls, referring to a kind of score that affects the progress of the game).
Its a good idea to think about how you can group similar data together. This reduces the contortions you will have to go through to come up with names, makes the code cleaner, and makes the data model make more sense.
We've already decided to use a dictionary for the game state, so we can do the same to track this equipment-related information:
1 2 3 4 5 6 7 8 9 10 11 12 13 14 15 16 17 18 19 20 21 22 23 24 25 26 27 | balls = 2
balls_lost = 1
balls_used = 3
balls_caught = 0
# -- VS --
balls = 2
baseballs = {
'caught_by_fans': 0,
'lost': 1,
'used': 3
}
# or even
balls = 2
equipment = {
'balls': {
'caught_by_fans': 0,
'lost': 1,
'used': 3
},
'bats': 10,
'athletic_cups': 11,
'shoes': 13
}
|
As you can see, modeling the data this way gives us a lot more flexibility.
It sets us up for modeling more complex things, like the total amount of equipment used in the game.
The context makes simpler variable and key names make more sense. equipment['balls']['lost'] has more contextual information than balls_lost.
This is all very basic Python stuff, but I want to make sure you're thinking about different ways to model your data. It's one of the foundations to writing well-behaved, easy-to-read code and something you usually learn over time. Thinking about it critically now, if you're a newer programmer, gives you a big head start on becoming a great engineer. 💖
Dictionaries are limited in that they are strictly mappings of some key to some value. There are times when you will need to add more functionality, or reproduce a data structure multiple times. That's where classes come in.
A class, in the simplest terms, is a data structure that contains variables (called attributes in Python, you may see them referred to as properties as well), and functions (called methods).
What makes classes special is that they are used as a blueprint for creating new objects. You define what your class looks like once, and then create instances of your class that store your data.
Tip
There is a ton more to classes in Python. This is called Object-Oriented Programming (OOP), and is a whole school of thought (or paradigm) unto itself.
I'm not going to go into too much detail here, since there is much to discuss.
A good place to start is the python OOP tutorial.
For our purposes, classes provide a way of reasoning about state in a self-contained manner. The class contains all of our state variables as attributes, and it has methods that provide functionality. We can extend the class if we need to, and can even use it to handle global state for multiple, similar parts of our project.
Attributes are like our state variables - just data that's being stored.
Methods are just functions that are part of a class. What sets them apart is their context. Put simply, a function runs within the Python module where its defined. A method runs within the instance of the class where it was defined.
Another important distinction is that methods always take an extra parameter, that, by convention, we call self. That parameter contains the instance that the method is being called on. An instance is essentially an "active" copy of the class. Using architecture as an analogy, if the class is the blueprint, the instance would be the building.
What it means, in practical terms, is having the instance passed as an argument gives your method access to the data and other methods that the instance contains. Inside of a method, you normally wouldn't know which instance the method was being called on. self gives us that bridge from the class to the instance.
Here's a simple example of a class that represents our baseball scoreboard:
1 2 3 4 5 6 7 8 9 10 11 12 13 14 15 16 17 18 19 20 21 22 23 24 | class ScoreBoard:
def __init__(self):
self.scores = {
"guest": 0,
"home": 0
}
self.inning = 1
self.out = 0
self.ball = 0
self.strike = 0
self.extra_innings = False
def tied(self):
return self.scores["home"] == self.scores["guest"]
def next_inning(self):
if self.out == 3:
self.inning += 1
if self.inning > 9 and not self.tied():
print("Game is over")
else:
self.extra_innings = True
|
Explanation
Since we've added some behavior that reflects some of the basic rules of the game of baseball, some brief explanations of what we're modeling are in order before we dig into the code.
In baseball, there are nine innings. The teams switch sides every inning. An inning lasts until three outs are scored.
If the score is tied during the last inning, the game is said to be in "extra innings" and the game continues on until three more outs are scored, and the score is no longer tied.
This code represents a fairly basic example of a Python class. The next_inning() method drives the game forward - every time it's called, it checks the number of outs and the score and increases the inning number if necessary. It also handles the concept of "extra innings" and overtime due to a tie.
We've modeled it this way because it's similar to the state management code we'll be writing below.
Line 1 sets the name of the class.
Every method defined in the class will be passed at least one parameter, self. self is a reference to the current instance of the class.
Lines 2-12 define the constructor of the class, which is always named __init__(). This method is called only once, when the class instance is initially created.
In Python, a class method name surrounded by two underscores on each side is considered "magic" - it has special meaning, like how this method is the constructor.
Tip
Magic methods are a extremely useful feature of Python, and are worth researching fully.
Check out this comprehensive view of magic methods in Python for more information.
The constructor is used to establish all of the default values for the instance attributes. That's what's occurring on lines 3-12.
Instance methods are defined on lines 14-15 (tied()), and 17-24 (next_inning()).
Instance methods are methods that operate on an instance of a class. A reference to the instance is passed to all instance methods, named self. We call them instance methods to differentiate them from class methods. Class attributes are explained a bit later on in this article. The thing to know about class methods is that instead of the first parameter being a reference to the instance, its a reference to the class.
Tip
Most of the time you won't have to deal with class methods. In fact, to use them, you must decorate a method with the special @classmethod decorator.
tied() will returns True if the game is tied, and False if not.
next_inning() advances the inning, and ends the game when we reach inning number 9. That is, unless its a tied game, then it sets self.extra_innings to True, and continues counting.
tied() is a typical utility method, used by either someone interacting with the instance, or by the instance itself, to do some calculations based on the current values of the instance attributes.
next_inning() is used to encapsulate all of the logic that goes into determining if the game has ended or not, as well as doing any accounting necessary to move on to the next inning.
Here's how we interact with it:
 >>> board = ScoreBoard()
 >>> board.out = 3
 >>> board.next_inning()
 >>> board.inning
 2
 >>> board.tie()
 False
 >>> board.scores["guest"] = 8
 >>> board.scores["home"] = 8
 >>> board.tie()
 True
 >>> board.next_inning()
 >>> board.next_inning()
 >>> board.next_inning()
 >>> board.next_inning()
 >>> board.next_inning()
 >>> board.next_inning()
 >>> board.next_inning()
 >>> board.next_inning()
 >>> board.inning
 10
 >>> board.extra_innings
 True
 >>> board.scores["home"] = 9
 >>> board.next_inning()
 Game is over
The attributes of this class are the same values we were storing in variable above, plus one more, extra_innings. We opted to use a dictionary to store the scores, just to illustrate that you can use any sort of data as an attribute.
The methods we've defined are tied(), that tells us if the score is tied, and next_inning(), which moves the game along.
Note how the methods can call each other, and access all of the instance data, via self.
We have an example of some complex logic using a combination of instance attributes and methods: when we call the next_inning() method, we have some logic to check if the game is tied (using the tied() method) at the 10th inning. If it is, the extra_innings flag is set to True. Otherwise, the game is over.
So using instance methods and attributes, extra_innings() acts to alter the instance attributes.
This is something special that classes give us over other ways of modeling state. We have a fully encapsulated state object - everything we do with state, and all the data we care about, lives inside that object, represented by the ScoreBoard class, in its attributes. We perform operations on those attributes using the class' methods.
We can treat an instance of the ScoreBoard class as a "black box" - we don't need to know the intimate details of how it works to interact with it.
Now lets look at how we can work this concept into a microcontroller project. We'll start by bringing things back to basics.
Conclusions And What's Next
In this installment of the series, we've learned a lot about what state is, and how to model it in Python. We've modeled state using single variables, complex data structures, and classes.
We've discussed a problem that we can solve with state, button debouncing.
In the next article, we'll actually apply what we've learned to debounce buttons without blocking, do some more OOP in CircuitPython, and explore what state can do for us in more detail.
Tip
Good news! You don't have to wait, part 3 is up now!